If you’re getting braces in Burnaby, you might start your orthodontic journey with tiny spacers placed between your back teeth. These small rings help create space for metal bands, a necessary step for some types of braces.
At Burnaby Dentist & Orthodontist, we don’t offer traditional braces that require spacers. Instead, we provide Invisalign® clear aligners, which straighten teeth without separators, wires, or metal bands.
Still, many patients come across the term “spacers” when researching orthodontic care, so we’ve created this guide to explain what they are, when they’re used, and how Invisalign® offers a more comfortable alternative.
At a Glance:
Orthodontic spacers are tiny rubber or metal rings placed between molars before braces to make room for metal bands. They’re used only when needed and typically stay in for about a week.
At Burnaby Dentist & Orthodontist, we don’t offer braces or use spacers. We provide Invisalign®, which gently aligns teeth without bands, wires, or separators.
What Are Spacers and Why They’re Used

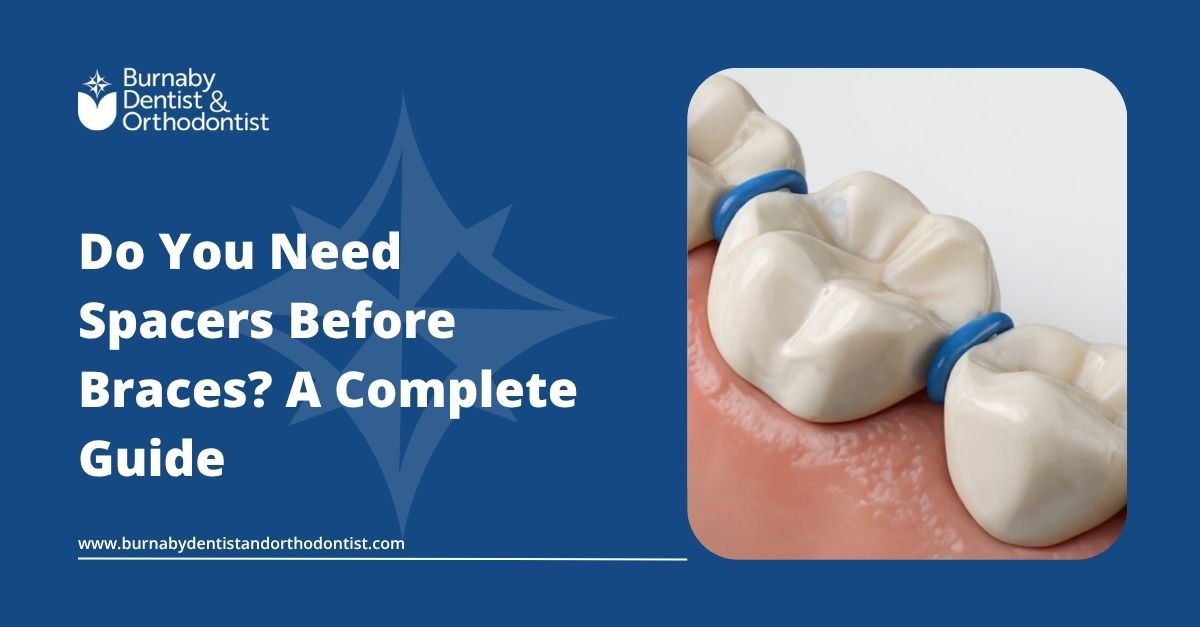
Orthodontic spacers, also called separators, are small elastic or metal rings placed between your back teeth before braces are applied. Their purpose is to create the slight space needed for molar bands, which act as anchors for your braces.
If your teeth are tightly aligned, these bands can’t be fitted comfortably without first opening the contact points. Spacers gently nudge teeth apart over several days, ensuring your braces can be placed smoothly and without unnecessary discomfort.
These tiny rings make braces fit more comfortably by creating microscopic space around back teeth.
Orthodontists use spacers only when your bite and alignment require space for bands. This step isn’t necessary for treatments like Invisalign®, which we offer at Burnaby Dentist & Orthodontist.

Begin Your Smile Journey With Dr. Sasan Hadianfar
Rubber vs. Metal Spacers: What’s the difference?
Not all orthodontic spacers are the same. The type your dentist uses depends on how tightly your teeth are positioned and how much space is needed for your braces to fit properly. Here’s a quick look at how rubber and metal spacers compare:
| Table: Rubber vs. Metal Spacers: Key Differences at a Glance | ||
| Feature | Rubber Spacers | Metal Spacers |
| Material | Elastic Rubber | Stainless Steel |
| Flexibility | Soft and Stretchable | Firm and Spring-Like |
| Best For | Mild to Moderate Spacing Needs | Tight or Resistant Teeth |
| Comfort Level | Gentle and More Comfortable | Slightly Firmer Feel |
| Duration of Use | Usually Worn for About a Week | Similar Duration, Case Dependent |
| Ease of Placement | Quick and Simple to Insert | Requires More Precision |
| Primary Benefit | Provides Gentle Pressure for Gradual Separation | Effective for Close or Overlapping Molars |
Rubber spacers are the most common choice. They’re soft, flexible, and easily stretched into place. These small elastic rings apply gentle pressure that gradually separates the teeth, making them ideal for patients with mild to moderate spacing needs.
Metal spacers, by contrast, are made of thin stainless-steel springs. They’re slightly firmer and used when teeth are more tightly aligned or resistant to movement. Their spring-like tension helps achieve the needed space when rubber spacers aren’t sufficient.
Does everyone need spacers before braces?
Not every patient undergoing teeth straightening options will need spacers, and that’s completely normal. These small separators are only used when your back molars are tightly positioned and lack the natural space required for orthodontic bands.
Bands are the metal rings that secure certain parts of traditional braces, helping guide tooth movement and maintain stability throughout treatment. When there isn’t enough room for them to fit comfortably, spacers are placed a few days before your next visit to gently and predictably create the space your orthodontist needs.
You may need spacers if:
- Your molars are tightly aligned.
- You’re getting traditional braces that use metal bands.
- It’s your first orthodontic treatment, and your teeth have gradually shifted closer over time.
➤ Thinking About Aligners Instead?
Invisalign® doesn’t require spacers or metal bands. If you’re looking for a gentler, more discreet way to straighten your teeth in Burnaby, we can walk you through your options during a free consultation.
Do Clear Aligner Patients Need Spacers?
No. If you’re starting clear aligner treatment, such as Invisalign®, you won’t need spacers at all. Aligners don’t rely on metal bands around your molars, so there’s no need to create space before treatment begins.
Instead, your orthodontic journey starts with a digital 3D scan that maps your teeth and bite in detail. This scan allows us to design aligners that fit perfectly without separators or band placement.
What to Expect During Spacer Placement (Step by Step)
This visit is short and straightforward. We keep you informed at each step so nothing feels unexpected.

Step 1: Pre-Check & Comfort Setup
We review your plan, confirm which molars need space, and answer questions. No injections or numbing are typically required. If gums look inflamed, we may reschedule after hygiene to keep things comfortable.
Step 2: Tooth Surface Prep
We gently polish the contact points (where teeth touch) and dry the area. A fine dental floss or placement tool is threaded through the contact to guide the spacer accurately.
Step 3: Spacer Stretch & Placement
Using a small hemostat or separator tool, we stretch the elastic ring and slide it between your back teeth. You’ll feel pressure, not sharp pain. Most patients describe it as a “popcorn hull” sensation.
Step 4: Position Check
We verify the spacer sits slightly below the contact point (not on the gums) and confirm it’s secure. If the contact is very tight, we may place a spring-style metal separator instead of elastic to achieve predictable spacing.
Step 5: Repeat on the Opposing Side (If Needed)
We place spacers symmetrically when both sides will receive bands. Each insertion takes seconds; the full chair time is usually 5–10 minutes, depending on how many spacers you need.
Step 6: Immediate Sensations & Normal Reactions
Expect tightness or dull pressure for the first 6–24 hours as teeth begin to move fractions of a millimetre. Light tenderness when chewing is common. Mild gum soreness near the contact can occur and should ease quickly.
Step 7: In-Office Safety Check Before You Leave
We confirm the spacers aren’t impinging on the gum line, review how they should look and feel, and show you how to visually check they’re still in place at home.
Step 8: Same-Day Home Guidance (Brief)
For the rest of the day, chew gently and avoid “testing” the spacers with your tongue or fingers. You can brush as usual, staying superficial around the spacer sites; skip flossing between those specific teeth until we advise otherwise. If needed, take an over-the-counter analgesic as directed.
Step 9: What We’ll Do Next (At Your Follow-Up)
At your next appointment, we’ll remove the spacers, confirm the contact space, and proceed with band fitting if the space is adequate. If contacts are still very tight, we may adjust the approach to keep you comfortable.
How Long Spacers Stay in and What to Do If One Falls Out

Most patients wear spacers for five to ten days, depending on how tightly their teeth were positioned at the start. During this short phase, the spacers gently shift your molars just enough to make room for the metal bands that anchor your braces.
How Long You’ll Need to Keep Them In
Your orthodontist will confirm the exact timeline during your visit. For most, one week is enough to achieve the needed space. You’ll return once that space has stabilized so your braces can be fitted comfortably and accurately.
It’s normal to feel pressure or mild tenderness during the first day or two. This simply means the teeth are responding. Once they begin to move, the sensation usually fades, and you’ll stop noticing the spacers altogether.
If a Spacer Falls Out
Sometimes, a spacer may slip out on its own. That often means it has already created enough space, but don’t assume it’s done its job just yet.
If a spacer comes loose or falls out:
- Avoid trying to replace it yourself. Spacers require precise placement to avoid gum irritation.
- Call our office promptly. We’ll determine whether you need a replacement or if the space is already sufficient.
- Do not chew on that side or pick at the area.
- Rinse gently with warm salt water if you feel mild irritation or tenderness.
Tips to Stay Comfortable with Spacers
Mild pressure or tenderness after spacers are placed is completely normal. It’s a sign that your teeth are gently shifting to make room for your braces. While that adjustment phase can feel strange, these simple habits can make it much easier to manage.
What to Eat with Spacers in Place
Your diet plays a big role in how comfortable you feel during this phase.
Stick to soft, smooth foods that require minimal chewing. Great options include:
- Mashed potatoes, oatmeal, and soups (served lukewarm)
- Pasta, eggs, and steamed vegetables
- Yogurt, smoothies, and pudding
Avoid crunchy, sticky, or chewy foods like nuts, chips, gum, or caramel, which can pull out the spacers or irritate your gums.
Ease Tenderness with Simple Home Care
If your teeth or gums feel sore, here are quick, dentist-approved ways to soothe them:
| Symptom | Quick Relief Method |
| Soreness or Pressure | Take Acetaminophen or Ibuprofen |
| Gum Irritation | Apply Orthodontic Wax |
| Swelling | Rinse With Warm Salt Water |
| Food Near Spacers | Clean Gently With Toothbrush or Water Flosser |
Don’t Pick or Play with the Spacers
It’s tempting to touch them with your tongue or try to “check” them with your fingers, but that can loosen them. Remember, even small movements can reduce their effectiveness. The best thing you can do is leave them alone and let them do their job.
Maintain Gentle Oral Hygiene
You can brush and rinse as usual, but avoid flossing between the teeth that hold spacers. Brush lightly around those areas with a soft-bristle toothbrush. If food tends to collect near your molars, use an interdental brush or a water flosser to clean around (not between) the spacers gently.
➤ Tip: If a spacer is irritating your cheek or gum, ask us for orthodontic wax. It creates a smooth cushion, reducing friction while you adjust.
Stay Patient; It’s Temporary
Any tightness or discomfort usually fades within 48 hours as your teeth adapt. Spacers only stay in for a short time, and once they’ve done their job, the rest of your orthodontic journey becomes much smoother

How to Brush and Floss Your Teeth with Spacers

Keeping your teeth clean during this short phase is just as important as when you’re wearing braces. Proper oral hygiene prevents plaque buildup, protects your gums, and keeps the spacer area healthy and irritation-free.
Brush Gently but Thoroughly
Use a soft-bristle toothbrush and fluoride toothpaste. Brush twice a day, especially after meals, to remove food particles near your molars. When brushing around the spacers, use small circular motions and avoid direct pressure. The goal is to clean the tooth surfaces without dislodging the rings.
Avoid Flossing Between Spacer Teeth
The space where spacers sit is extremely tight and sensitive. Flossing in those areas can tug them loose or irritate your gums. Continue flossing the rest of your teeth as normal; just skip the contact points where the spacers are until they’re removed.
Add a Water Flosser or Interdental Brush
If you prefer extra cleanliness, use a water flosser or interdental brush around the molars, but never force it into the space with the separators. The gentle water pressure or narrow brush helps remove food and plaque while keeping the area comfortable.
Rinse After Every Meal
After eating, swish with water or an alcohol-free mouthwash to dislodge trapped particles and soothe tender gums. A mild saltwater rinse also helps reduce inflammation and keeps the area feeling fresh.
➤ Tip: Staying consistent with your brushing routine now sets you up for easier hygiene once your braces go on. It’s one of the simplest ways to make your entire orthodontic experience more comfortable and successful.
What Comes Next: After Spacers, Before Braces
Once your spacers have created the right amount of room, the next phase of your orthodontic journey begins. This is where things start to feel real but also more comfortable, thanks to the preparation your spacers provided.

Step 1: Removing the Spacers
When you come in for your follow-up appointment, we’ll gently remove the spacers from between your molars. This process is quick and painless. Most patients describe the sensation as a light tug or release of pressure. Once they’re out, you’ll immediately notice that your bite feels more relaxed.
Step 2: Placing Molar Bands (If Needed)
Next, we’ll fit orthodontic molar bands, small metal rings that wrap around your back teeth to anchor the braces. Because the spacers already created room, these bands slide into place smoothly and without discomfort.
We’ll make sure each band fits snugly but not too tightly, checking that it feels comfortable before securing it in position.
Step 3: Final Fit and Adjustments
Once the bands are secure, we’ll double-check your bite alignment and gum comfort. Any minor irritation from pressure or new hardware can be managed immediately with adjustments or protective wax.
Step 4: Transitioning to Braces or Aligners
Depending on your personalized treatment plan, your braces may be placed during the same visit, or you may be preparing for Invisalign® or another clear aligner system.
If you’re moving into aligners, we’ll take your final digital scans using iTero technology to ensure your trays fit precisely and guide your smile transformation with accuracy.
Step 5: Aftercare Instructions
Before you leave, we’ll go over everything you need to know about the next few weeks, how to brush, what to eat, and what’s normal to feel. You’ll also receive a starter kit with hygiene tools and comfort tips to help you adjust smoothly.
➤ Want to Skip Spacers Altogether?
Invisalign® aligners move your teeth without bands, wires, or separators, so you can avoid the spacer phase entirely. Many of our Burnaby patients choose Invisalign® for a smoother, more comfortable orthodontic experience.
Digital Orthodontic Expertise and Spacer-Free Treatment in Burnaby
At Burnaby Dentist & Orthodontist, we specialize in Invisalign® clear aligners, a modern, comfortable alternative to braces that skips the spacer phase entirely. Our approach uses advanced tools like iTero with NIRI and Diagnocat AI to digitally map your smile, predict treatment outcomes, and deliver precise tooth movement with minimal disruption.
From your first scan to your final retainer, we guide you through each stage with expert support and personalized care. For anxious patients, oral sedation is available, and our multilingual team ensures clear communication throughout your experience.
We’re conveniently located near Metrotown with flexible hours (Monday–Friday 9–5, Tuesdays 8–5, Wednesdays until 6, Saturdays 9–4) and free onsite parking, making your Invisalign® journey easier from start to finish.
Conclusion: Start Your Smile Journey with Confidence in Burnaby
Understanding how orthodontic treatments work, including steps like spacers, can help you feel more prepared and confident as you explore your options you can also read about orthodontics in Burnaby. While spacers are commonly used in traditional braces, they aren’t required for every treatment approach.
At Burnaby Dentist & Orthodontist, we focus on modern, patient‑friendly orthodontic solutions, using advanced digital technology to guide treatment with clarity and comfort from the very beginning.
➤ Considering a Spacer‑Free Alternative?
If you’re exploring orthodontic options in Burnaby and want a comfortable, discreet solution without spacers or metal bands, book an Invisalign® consultation with our team today.
We’ll assess your smile using digital scans and walk you through whether Invisalign® can address your spacing or alignment concerns.
Do spacers hurt?

You may feel some pressure or mild soreness, especially in the first 24–48 hours. That’s normal and typically fades quickly.
Can I eat normally with spacers in?
Stick to soft, easy-to-chew foods. Avoid sticky, crunchy, or chewy items that could loosen or irritate the spacers.
What happens if a spacer falls out early?
Call us. It may not need replacing if enough space has formed, but we’ll check and guide you on the next step.
What’s the next step after spacers?
Once the space is ready, we place molar bands and begin your braces or aligner fitting—often at the same appointment.
Do all patients need spacers before braces?
No. Spacers are only used if molar bands are part of your treatment plan. If you’re getting aligners, they may not be needed at all.